|
Sure these are pretty scans but I need them to run in real-time in a game engine. The entire process of translating a model from RAW scan into game ready asset is an art form all it's own (or at least an important job). Luke Schloemer set out to create a UE4 asset pack out of the many props I've scanned (with my approval, of course). I'm very excited about this because I want to find ways to make my scans even more accessible to you. Yes, they are for sale! But even beyond that Luke has undertaken to share his process with all of us (see below). 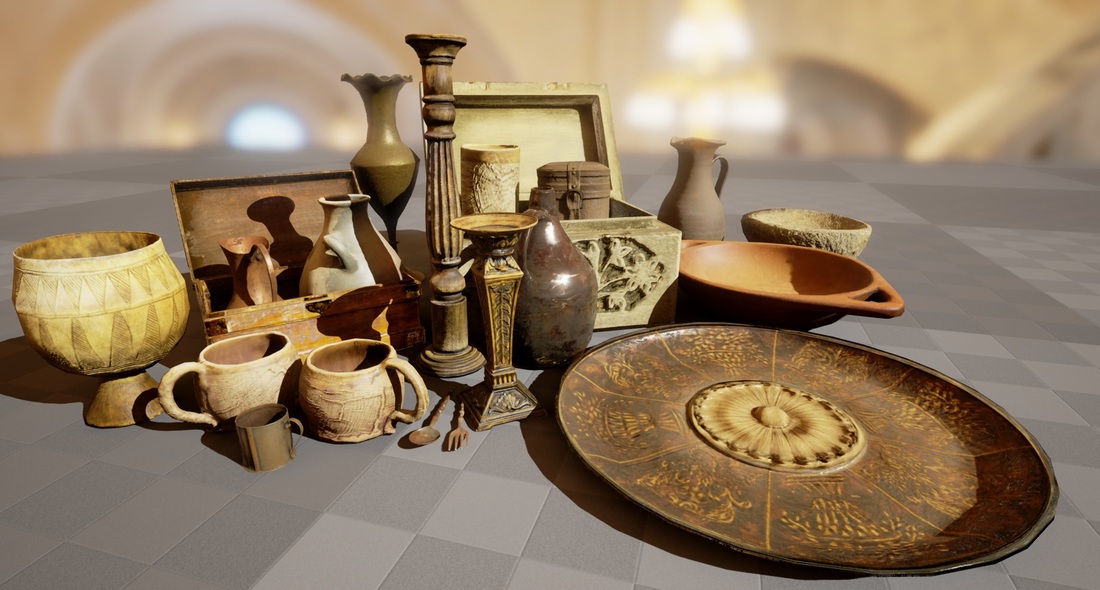 Step-by-step Breakdown from Scan to Game Engine |
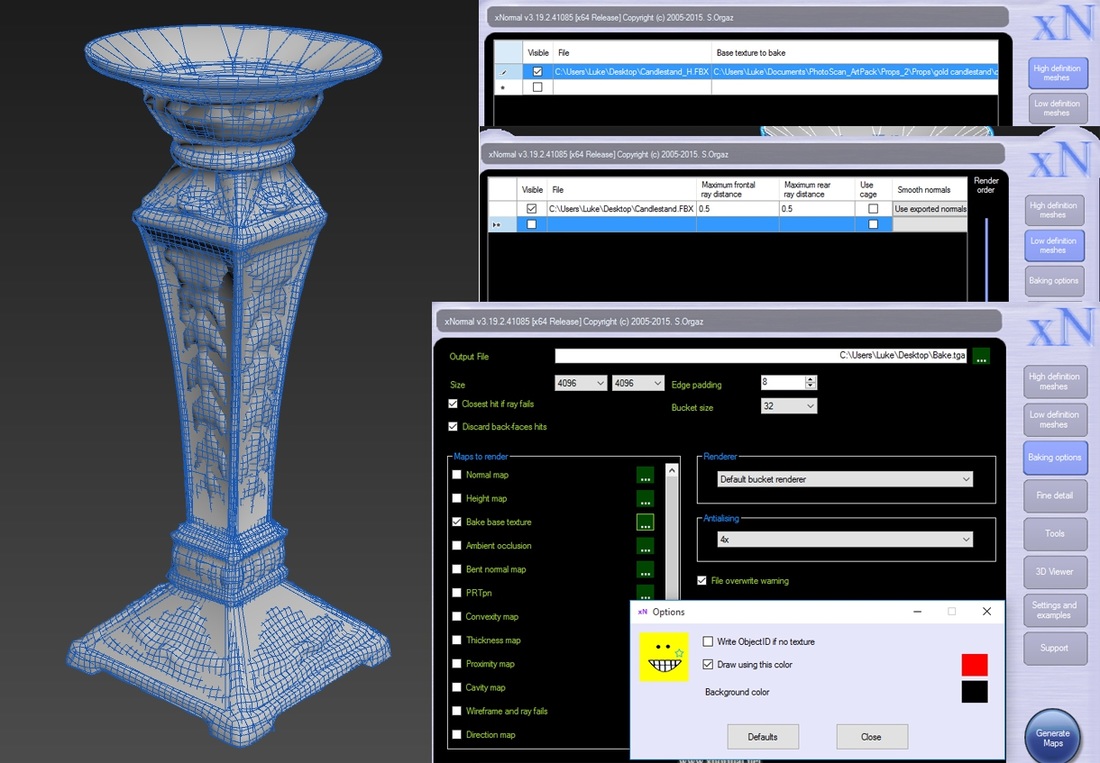
| After the textures were all baked I would load both meshes into Marmoset with textures hooked up so I could compare the newly baked textures with the original 3D scanned versions. If any issues were present in the projections I would paint them out in photoshop or adjust the baking options to get the result I want. Once both meshes were virtually identical in Marmoset, I would move on. | 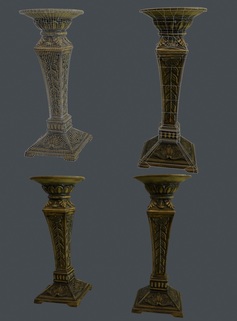 |
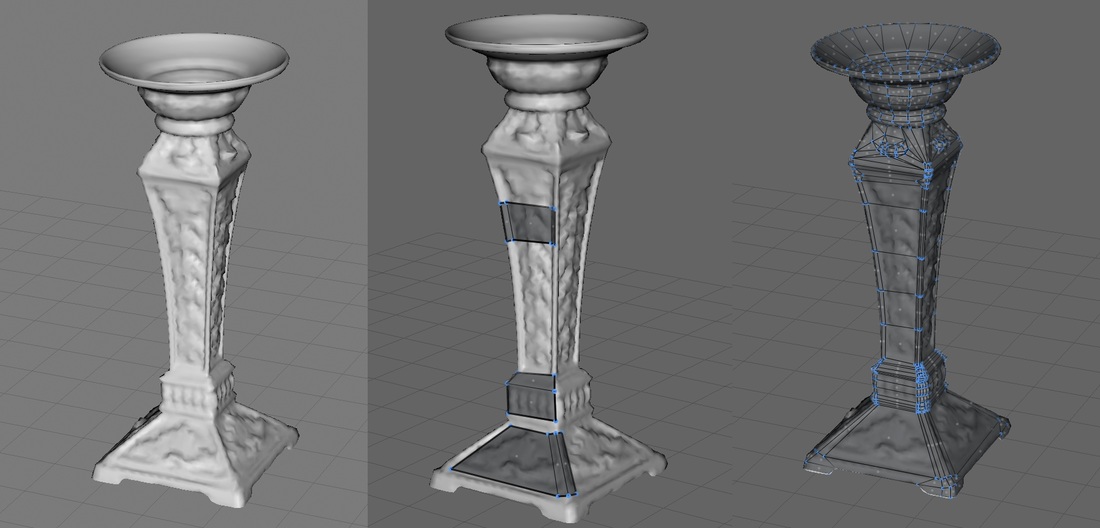
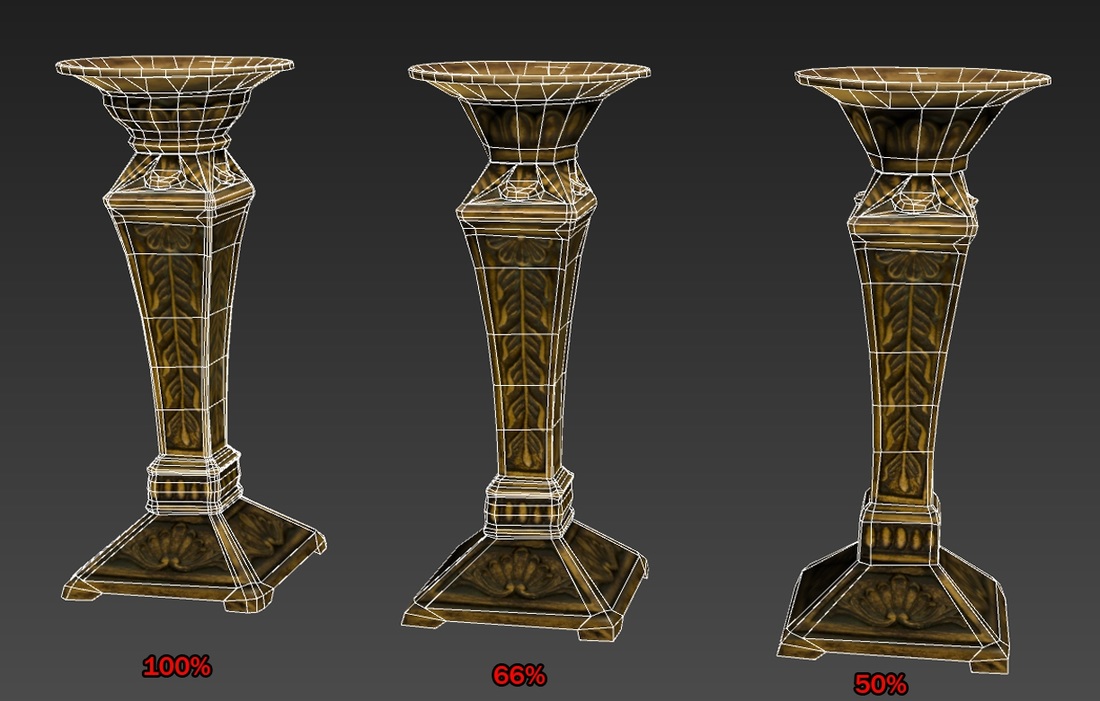
4. Create Level of Detail Meshes in 3dsMax
Once all my textures were projected onto the mesh and everything looked good I then moved onto creating the level of detail meshes to be used inside Unreal. I set a personal goal of having the first LOD mesh be reduced by about 50% of the tricount. The second LOD mesh ranged anywhere from 60-75% of the original mesh, depending on the prop. I brought the mesh into 3dsmax, applied the texture, and
then checked the “preserve UV's” option inside in the editable poly modifier. This way I could reduce the tri-count of the model while keeping minimum UV distortion.
then checked the “preserve UV's” option inside in the editable poly modifier. This way I could reduce the tri-count of the model while keeping minimum UV distortion.
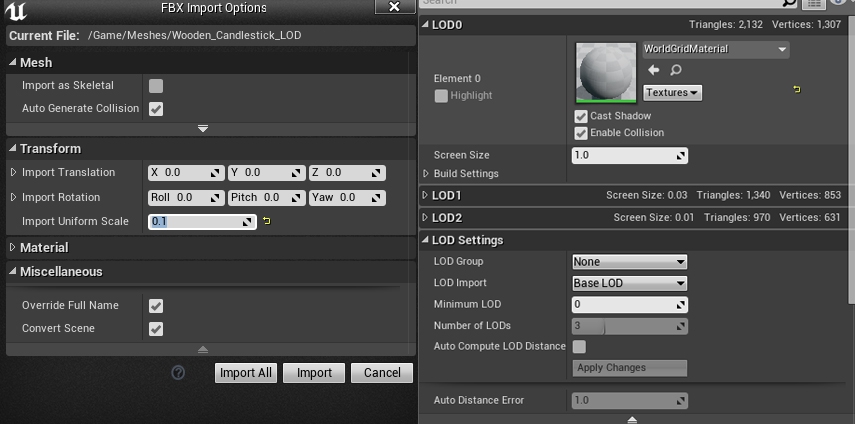
5. Import Everything Into Unreal 4
The importing process was the quickest part. I began by importing a single asset into my scene. As I began importing more assets, I noticed that a lot of the original scan's had drastically different scaling. So instead of having some sort of master 3dsmax scene, I just adjusted Unreal's scale import setting for each asset. I then imported each LOD in separately, and adjusted the build scale to match the import scale. I didn't care for Unreal's automatical LOD distance algorithm, so I adjusted it myself. LOD1 shows up when it only takes up 0.03% of the screen; LOD2 shows up when it only takes up 0.01% of the screen. This ensured that the highest detail version shows up the majority of the time.
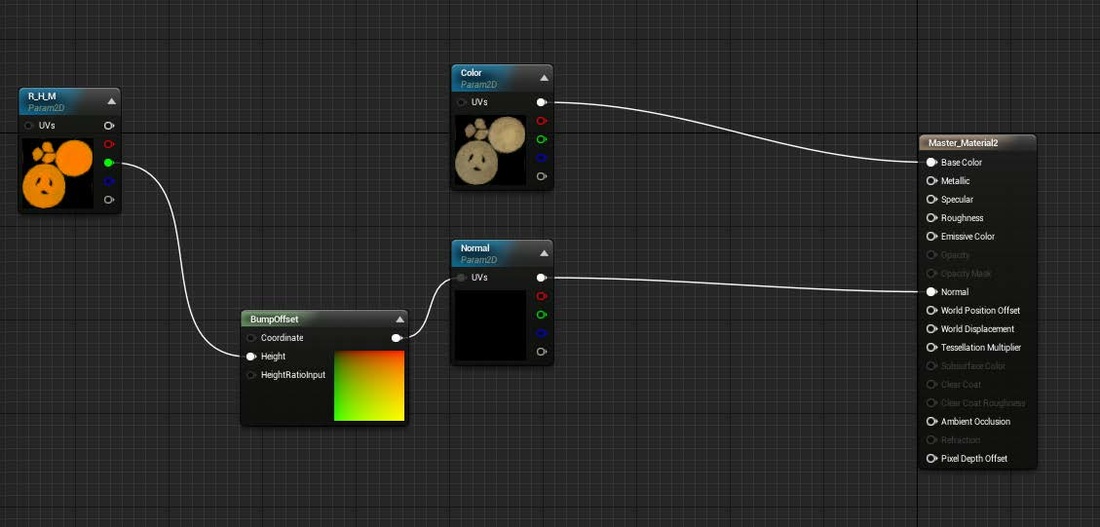
6. Create Master Material
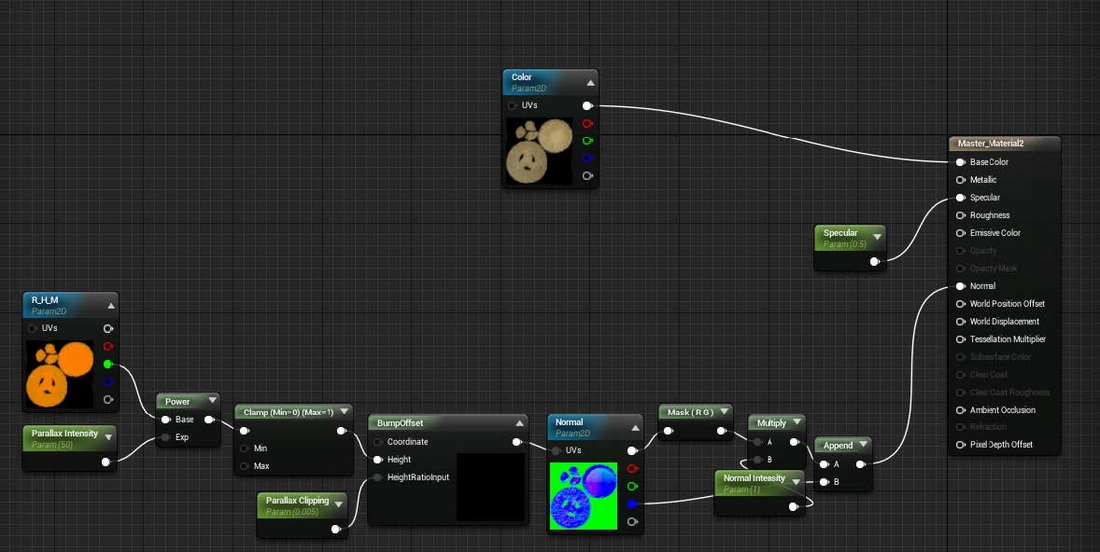
My favorite part of this project was working in the materials. Shader creation in Unreal is the best part for me personally. Instead of having multiple materials for each asset, I set out to create a master material with parameters that I could customize to get the look I wanted for each asset. This was my initial setup for the master material. Just basic plugs for the textures with a parallax node plugged into the normal map.
The next step was setting up some parameters to customize the normal map and parallax effects. I added 3 parameters. The first increases the contrast in the height map. The second is a parameter that adjusts the actual parallax effect with the clipping plane in the BumpOffset node. Finally I added a small network of nodes that adjusts the normal map intensity in the material instance.
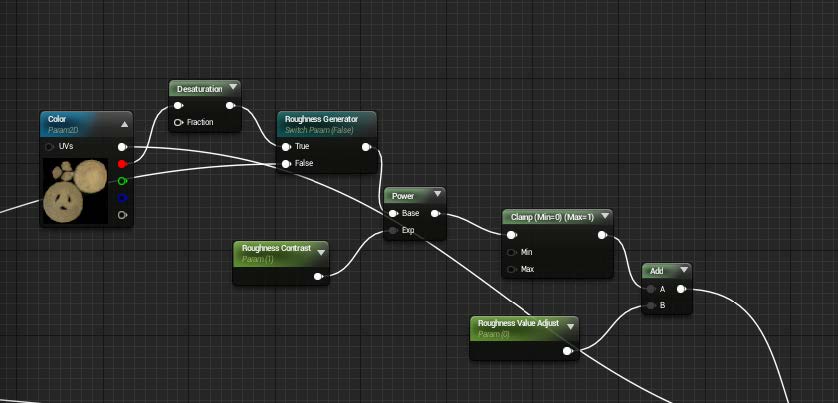
Next step in the material creation was a parameter system to concept out a look for the roughness map. First I desaturated the color map and plugged that into a Power node to increase the contrast. Then I added a final parameter to adjust the raw value before finally being plugged into the roughness. This way it allowed me to adjust contrast and then adjust the values to get a good look I want for the
specular values.
specular values.
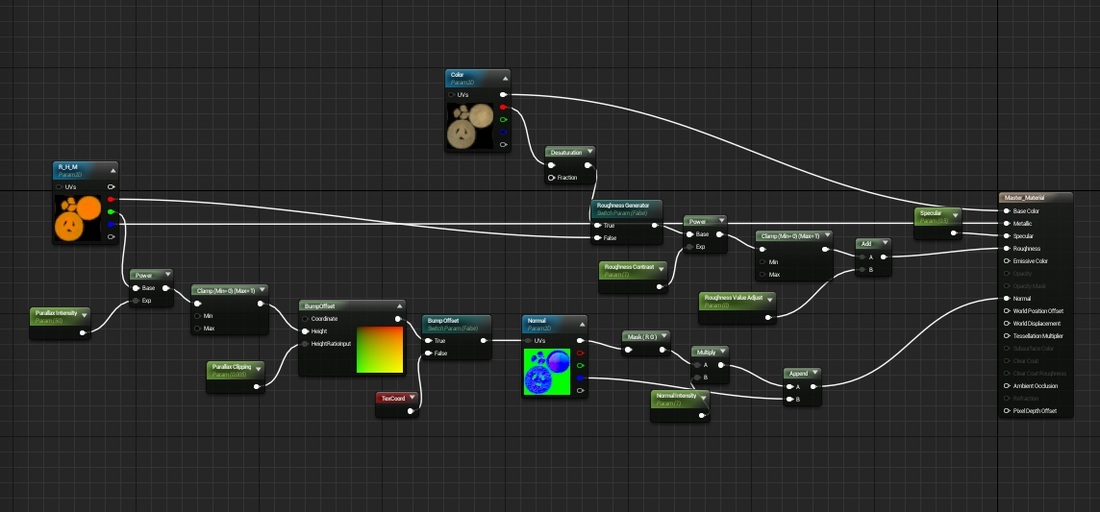
This is the final material network with all the parameters I wanted. I added static switch parameters to toggle between the roughness in the map that I will eventually create. As well as a toggle to enable the parallax map effect.
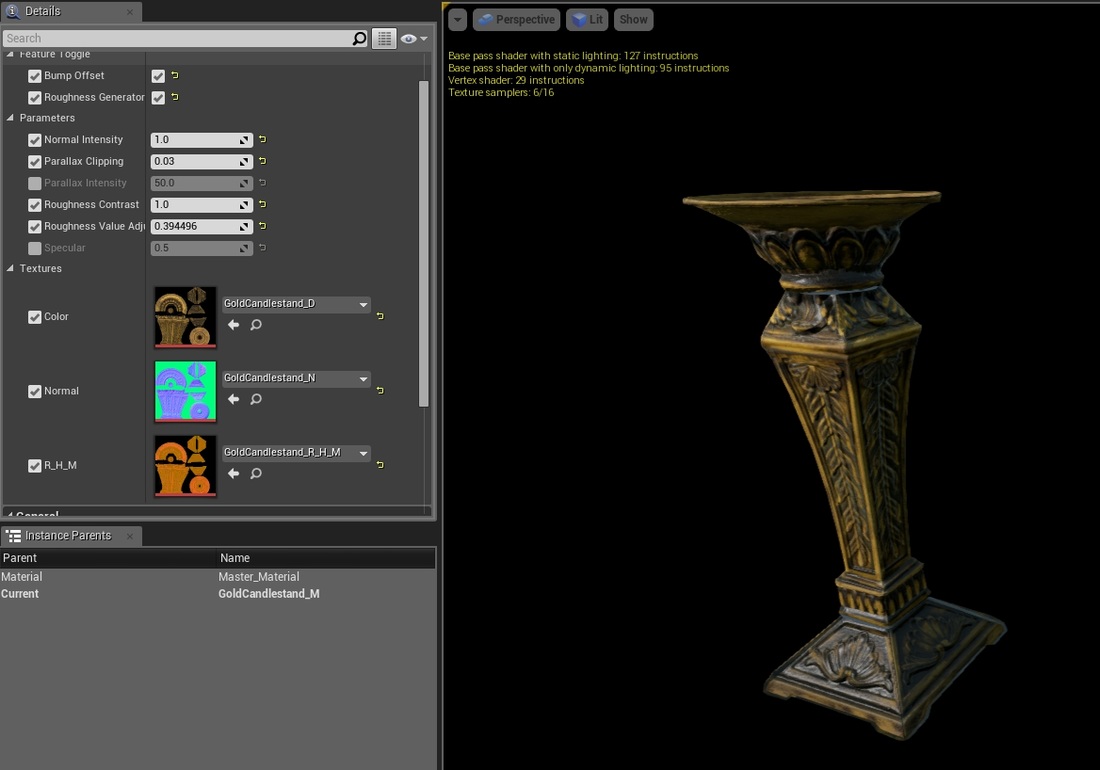
7. Create Material Instance
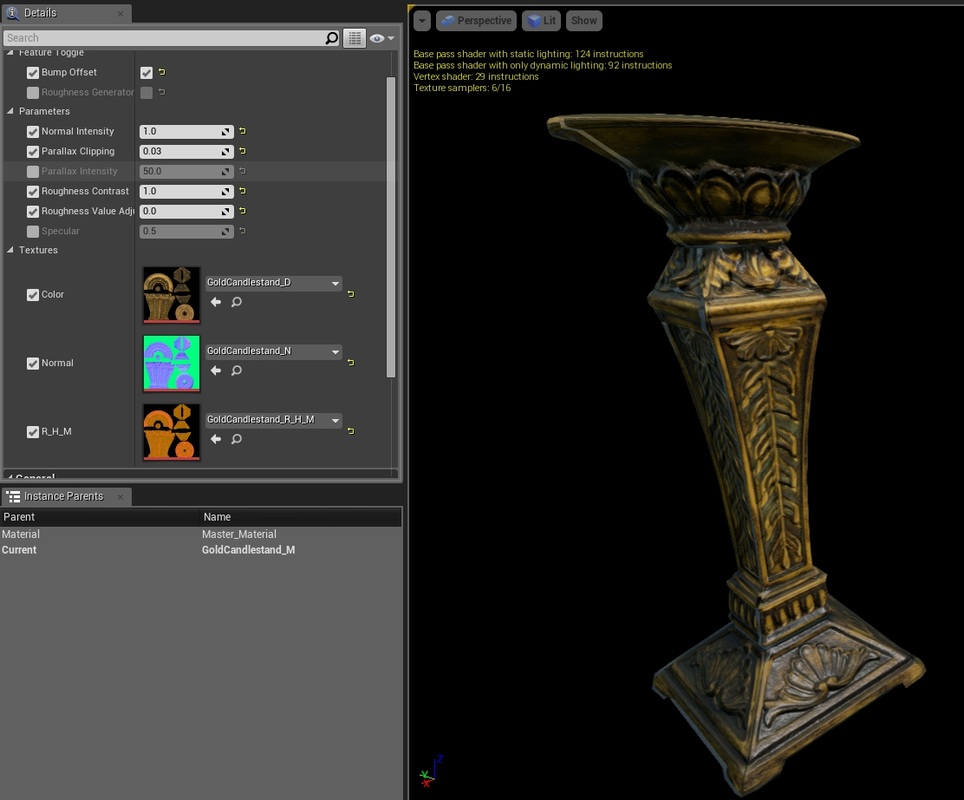
This was the final material instance. All these parameters allowed me to make tiny adjustments for each asset to get as close to the original scanned mesh as possible.
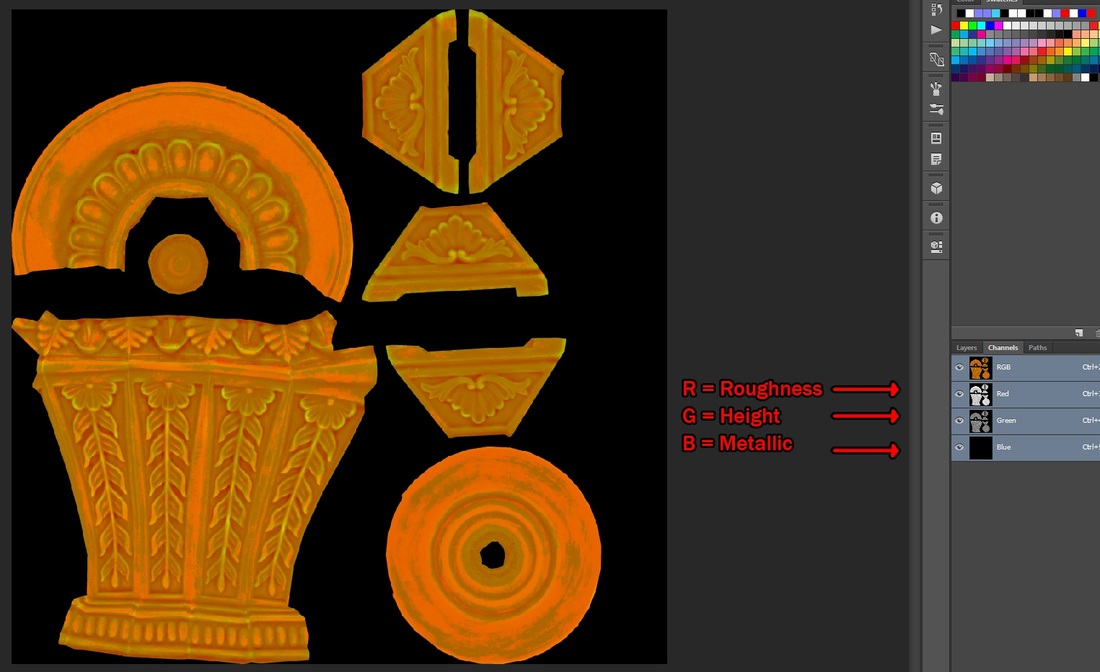
8. Create Roughness/Metallic Maps in Photoshop
Before I created my roughness/metallic maps in Photoshop. I used my roughness generator to get an approximate look I wanted.
I took the diffuse texture, desaturated it, and pasted it into the Red channel. Then I messed with the levels to match the look I have in Unreal with the roughness generator.
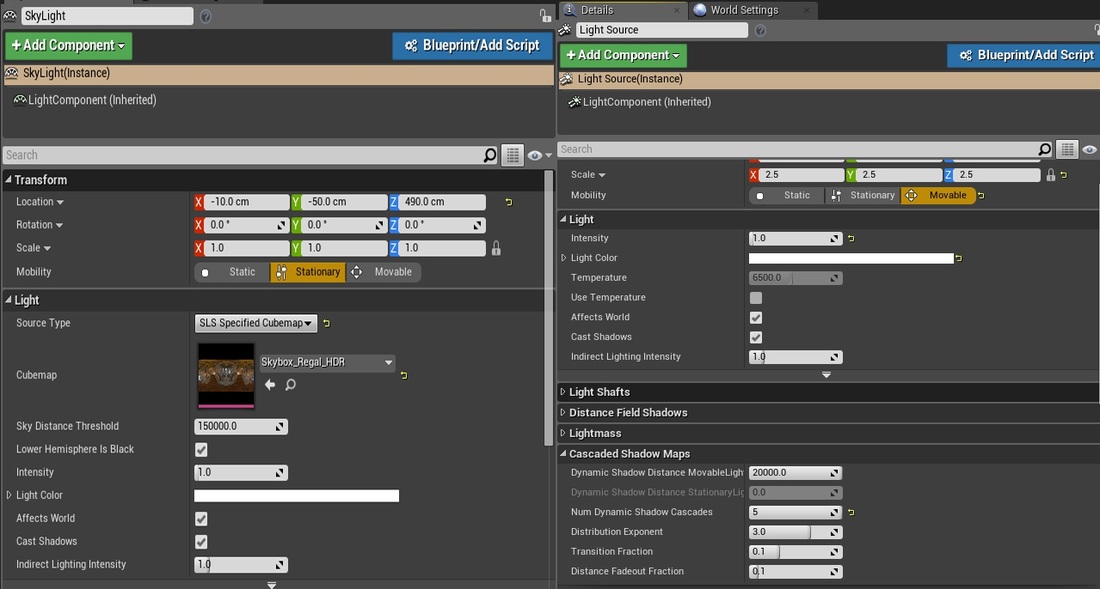
9. Lighting & Final Tweaks
To get the best results out of my material in Unreal 4, I decided to try and emulate Marmoset's rendering as close as possible. To do this I found a free HDRI image online. Plugged it into the skylight. I added a directional light to get crisper shadows and help push the HDRI lighting.
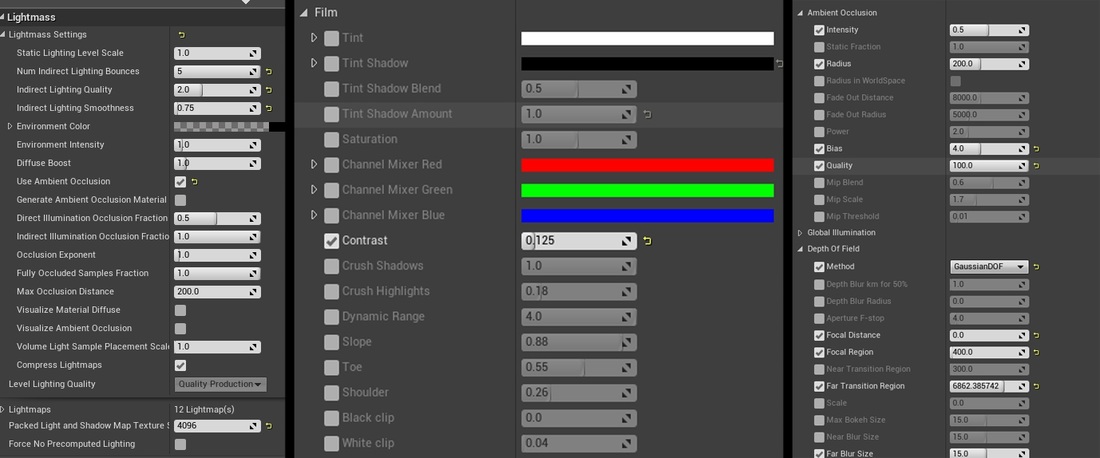
I adjusted a lot of the Lightmass settings to get a crisper and more accurate result. I also tweaked a couple of the post process settings to get more of a photo-realistic look. Increasing the contrast, depth of field, ambient occlusion, and anti-aliasing/screen space reflection quality helped push the realism even further.
10. Final Result
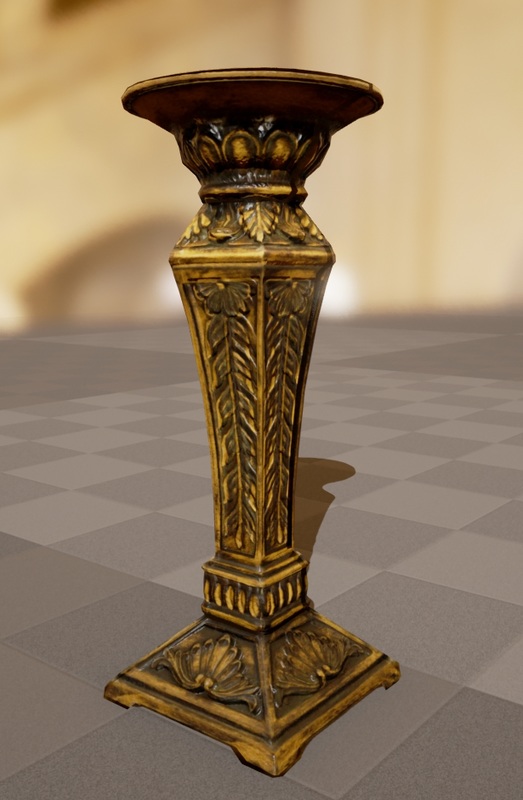
A big thank you to Luke for explaining his process and making these scans available for purchase for UE4. Very cool stuff.
Luke Schloemer is a freelance 3D Environment Artist with a passion for all things Unreal. To learn more and see more of his work you can view his website here http://www.LTS3D.com
Luke Schloemer is a freelance 3D Environment Artist with a passion for all things Unreal. To learn more and see more of his work you can view his website here http://www.LTS3D.com
2 Comments